10” rack project - The Bootcase
I recently bought an M4 Mac Mini to help with my coding and design projects. I love the small form factor, the sheer speed of it and the fact it uses only about 40W! I also have a few Raspberry Pi single board computers which run various roles in my smart home setup. One (Pi 4) works is a Rustdesk server so I can access my desktops from my laptop if I’m downstairs. Another (Pi 5) runs a Frigate NVR install with AI computer vision to detect people in the back garden and check that my 3D printer isn’t on fire. Some of my older models get used as retro gaming consoles, Home Assistant servers and host local webpages with sensor data or something similar.
These all work great, but my desk was getting very messy with wires. I wondered whether I could pack these all away somewhere where they could be organised, wired into my network and, if necessary, mobile.
I’d seen Jeff Geerling’s YouTube videos about 10” racks. Basically they are a simple, small form factor version of a 19” rack you’d find in an IT server room or data centre. These miniature hobby versions looked really professional and helpful, but I struggled to see the value in it; especially as the chassis was often over £100! Then I came across MandicReally’s video about his MOD10 system.
This modular, customisable, 10” rack compatible system was exactly what I was looking for. I own a 3D printer (or 3) so this was no bother to print out myself over the course of a couple of days. I got some M6 rack mount screws (the only additional hardware you need) from eBay and I was on my way!
There was already a beautiful M4 Mac Mini 10” rack mount on Printables, and several people have designed their own mounts for various Raspberry Pi SBCs. I knew I wanted the Pi 4 and Pi 5 in my rack, with my Pi 3B and Pi 2 as an optional add-on. Thankfully a user named Mauker on MakerWorld had designed a version-agnostic mount for just about any of the mainline Pi series (excluding the Zero and Zero 2 models). I had the same experience when choosing my 8-port network switch and within a couple of days I had it all up and running!
Behold: the Bootcase!
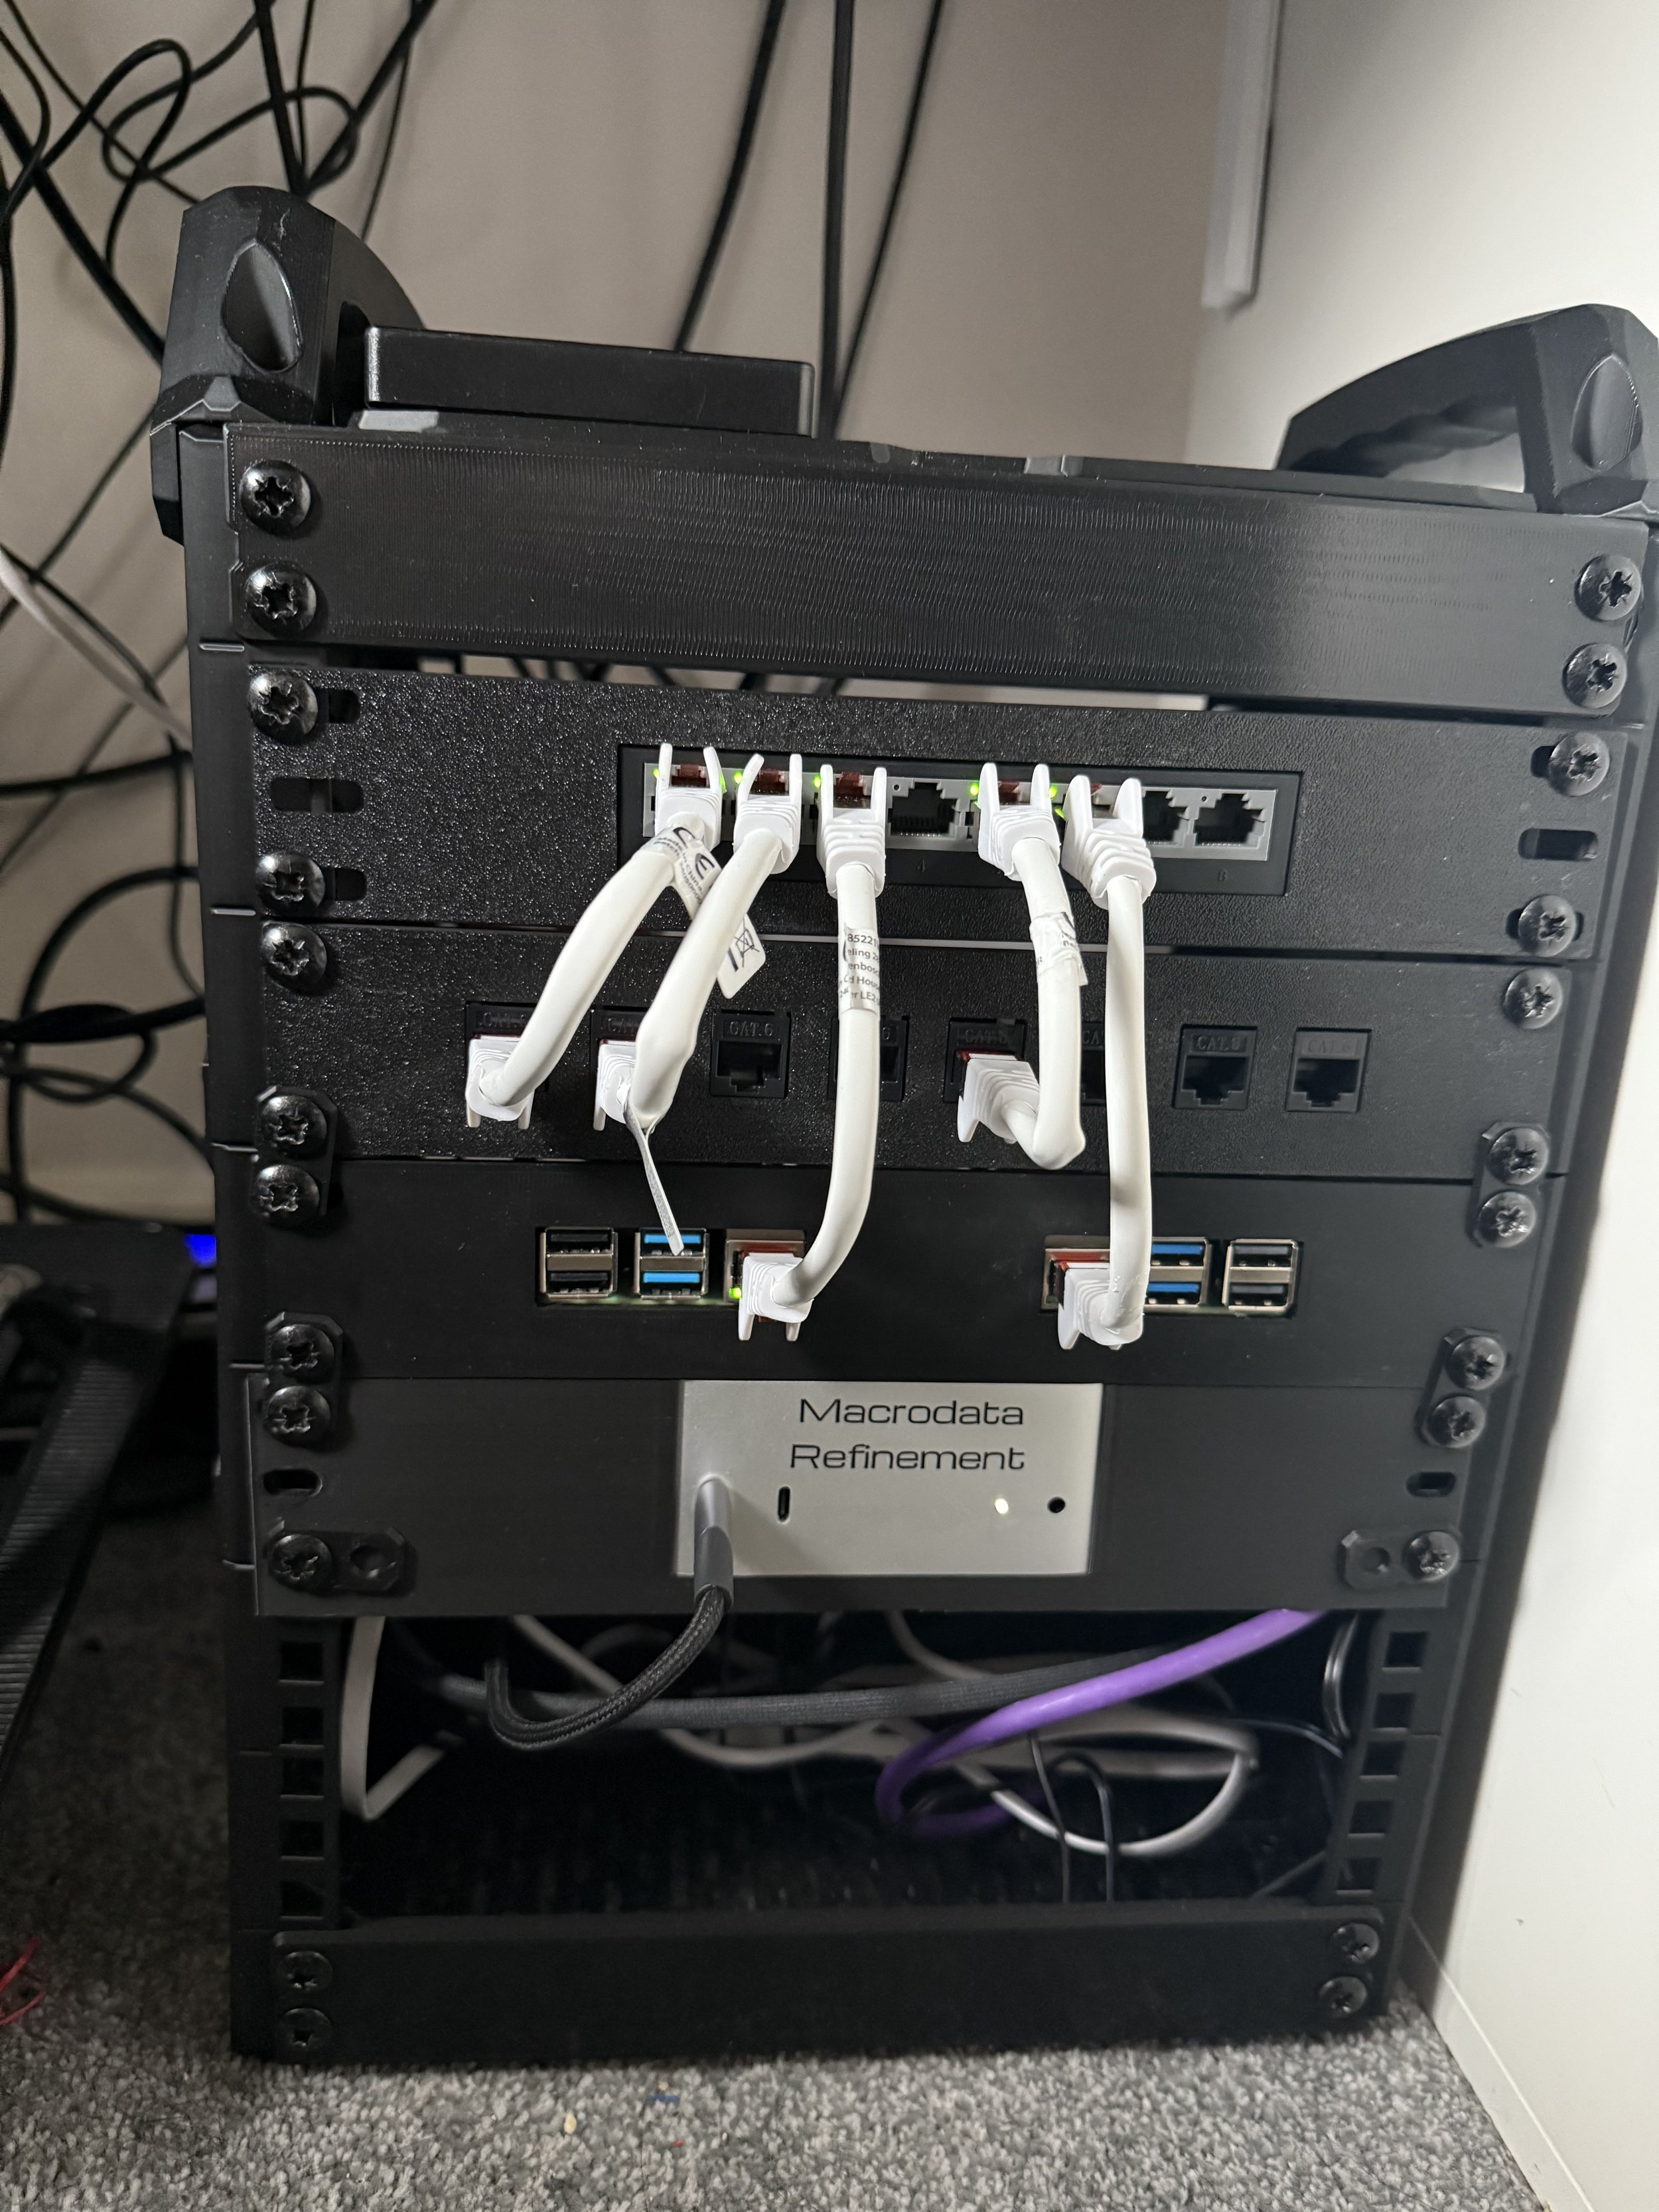
Ignore the mess of cables, I’m waiting to get a new desk before sorting it out!
I’m really pleased with how this went. It was pretty cheap to print in PLA (although the designer suggests ASA - I didn’t have any on hand).
The space at the bottom is open at the moment to allow better cooling of the Mac Mini as the exhaust fan is on the bottom of the machine. I’m not actively using the older Pi computers so I’m keeping them out of the rack for now as they don’t need to be on and using power.
I really hope someone appreciates the Severance vinyl on the Mac Mini…
This was a really fun little project, allowing me to cosplay as a sysadmin a little bit, to quote Jeff Geerling. I’ll add another blog post later on in the week going over the power supply and network cabling. I hope you enjoyed!